Reporting (District Manager)
The reporting feature in your District Manager allows you to run custom reports. This includes custom filters such as badge name, ID number, and date range, in addition to reports for specific groups of schools. For more information on School Groups, click here.
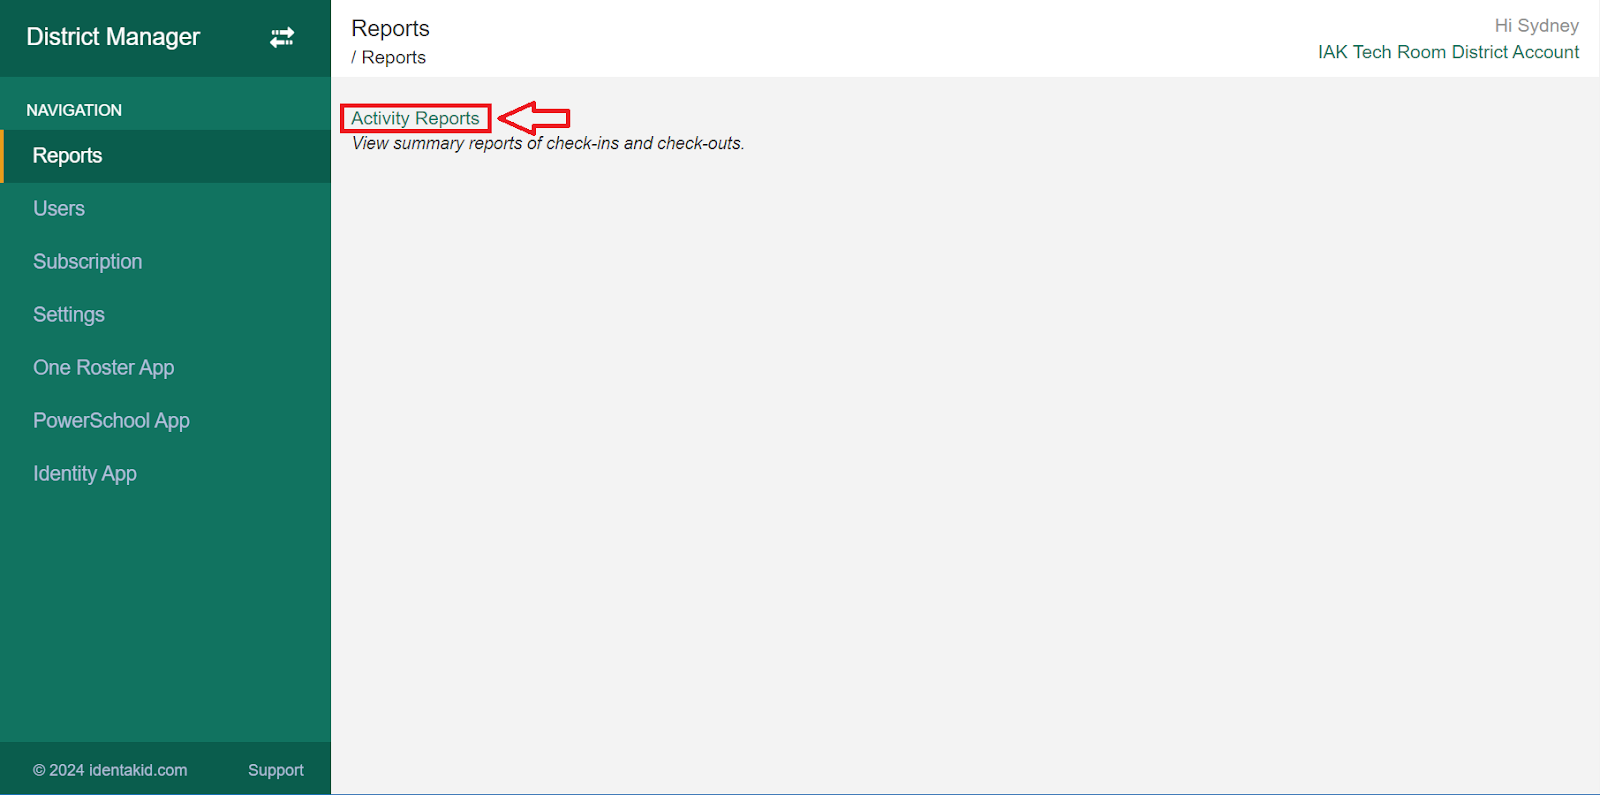
In your District Manager, click Reports in the navigation pane on the left-hand side.
Click Activity Reports.
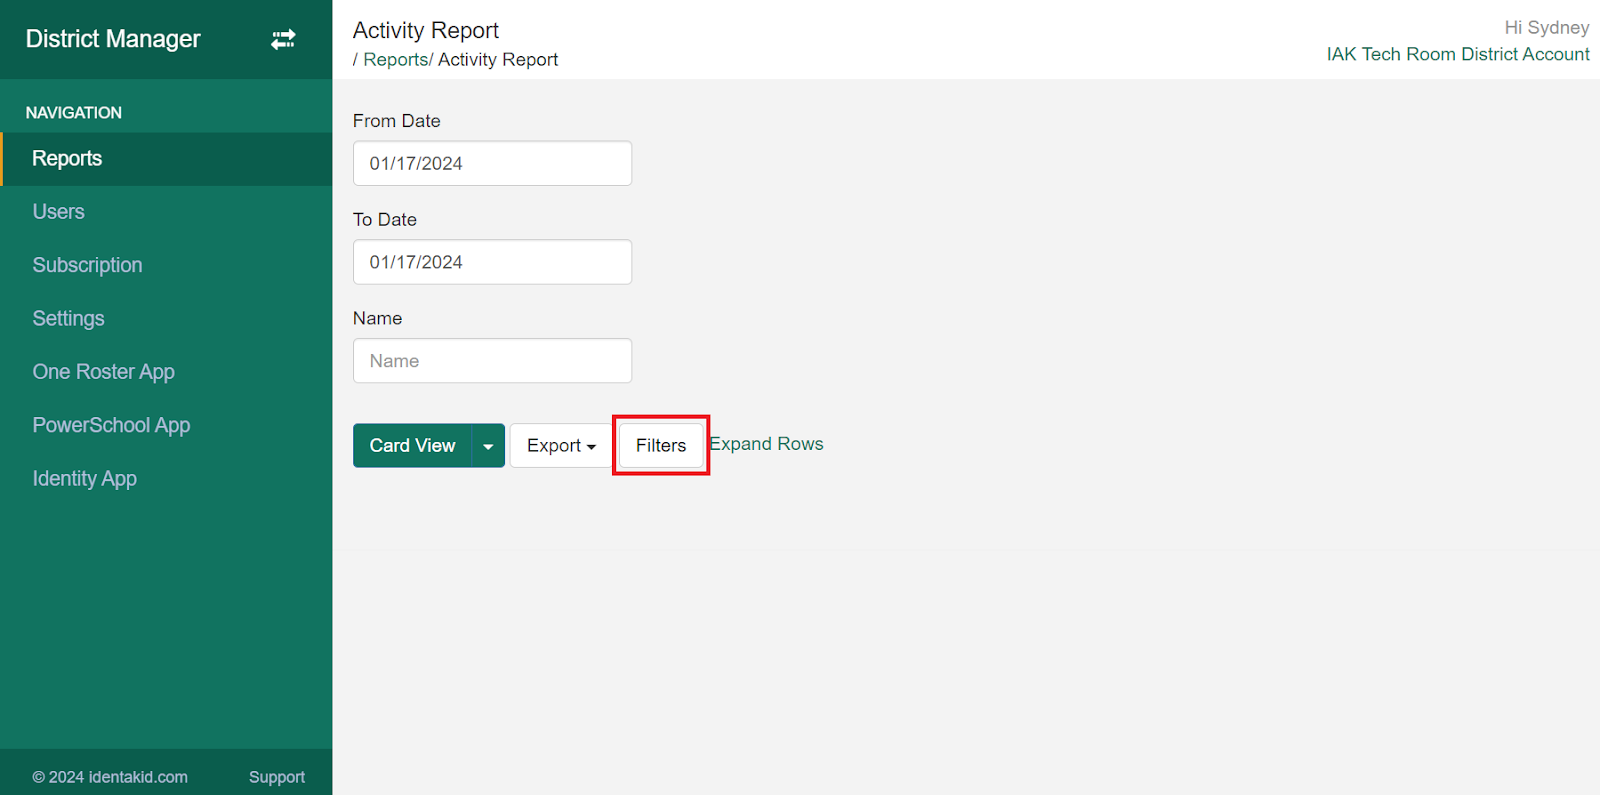
Here you will see some default filters you can use. More can be added by clicking Filters and choosing the ones you wish to use.
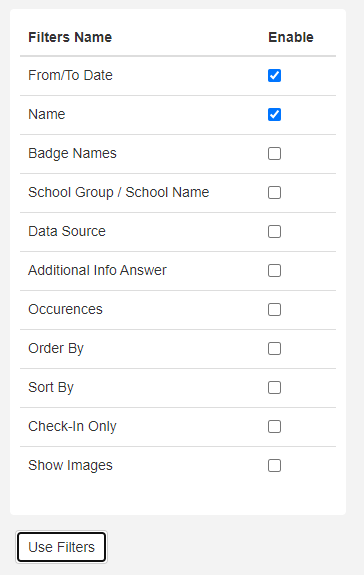
Filter Descriptions
From/To Date – Define the from and to date
Name – Define a specific first, middle, or last name
Badge Names – Define badge name(s) (Separate multiple badge names with a comma)
School Group/School Name – Define a specific school group or individual school location
Data Source – Determines what extra data fields are shown. These extra data fields can include Students, Student Contacts, RFID information, or other custom preloaded list info. More information below.
Additional Info Answer – Define specific additional info answered during check-in
Occurrences – Define number of occurrences for any record over a date range
Order By – Select order by data, including log in/out time, name, additional info, etc
Sort By – Choose either Ascending or Descending sort.
Check-In Only – Select this to only show records that have a check-in time but no check-out time. These would be users who are still logged into your system and are still on campus.
Show Images – Click here to show the webcam images with each record (if applicable)
Data Sources
The data source filter allows you to select which additional fields you see when running your report. Below are some examples of what you will see when choosing each of the Data Source options.
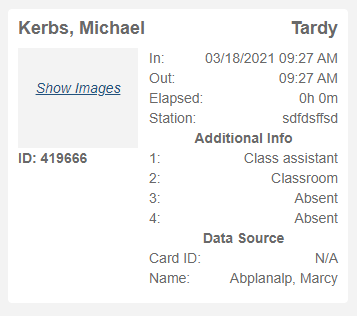
Default

The Default data source will show you the default check-in data including name, station name, and additional information.
Students
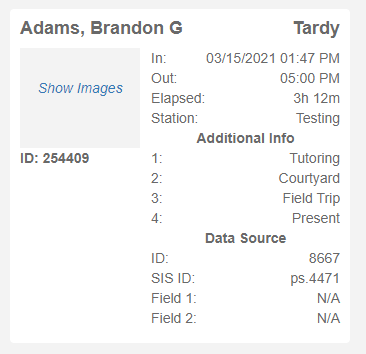
The Students data source will show your name, station name, student ID, and Field 1/2 data.
Student Contacts
The Student Contacts data source will show you the contacts’ name that was selected during a student check-in or out.
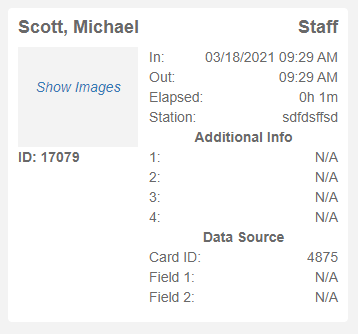
RFID
The RFID data source will show you the RFID Card ID and field 1 and 2 data.
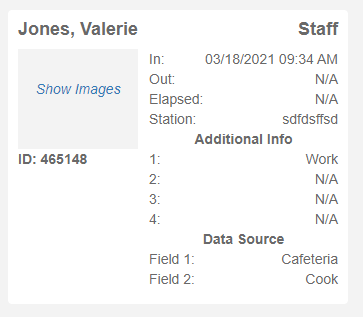
Preloaded
The preloaded source will show you any Field 1 and 2 data for any custom preloaded lists.
Once you have your filters selected, click Use Filters to apply those changes. Then simply fill out your chosen filters and click Card View or the down arrow next to it to choose Table View. These allow you to view the report directly in your browser.

If you need to export the report click Export and choose your desired file type.