Custom Preloaded Lists (District Manager)
Custom preloaded lists allow you to create your own preloaded lists.
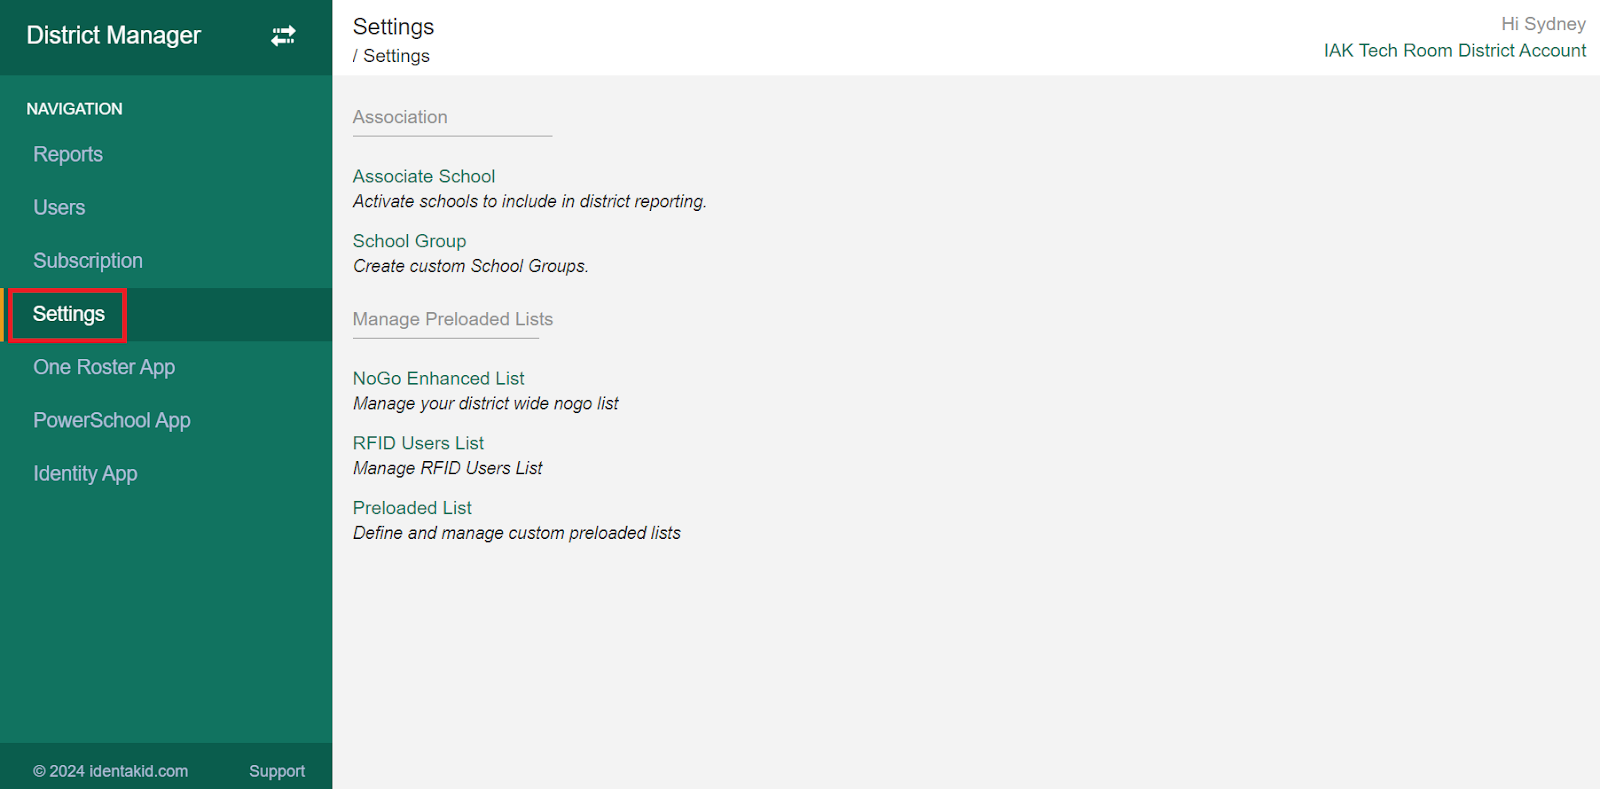
On the left-hand navigation pane, click on Settings.
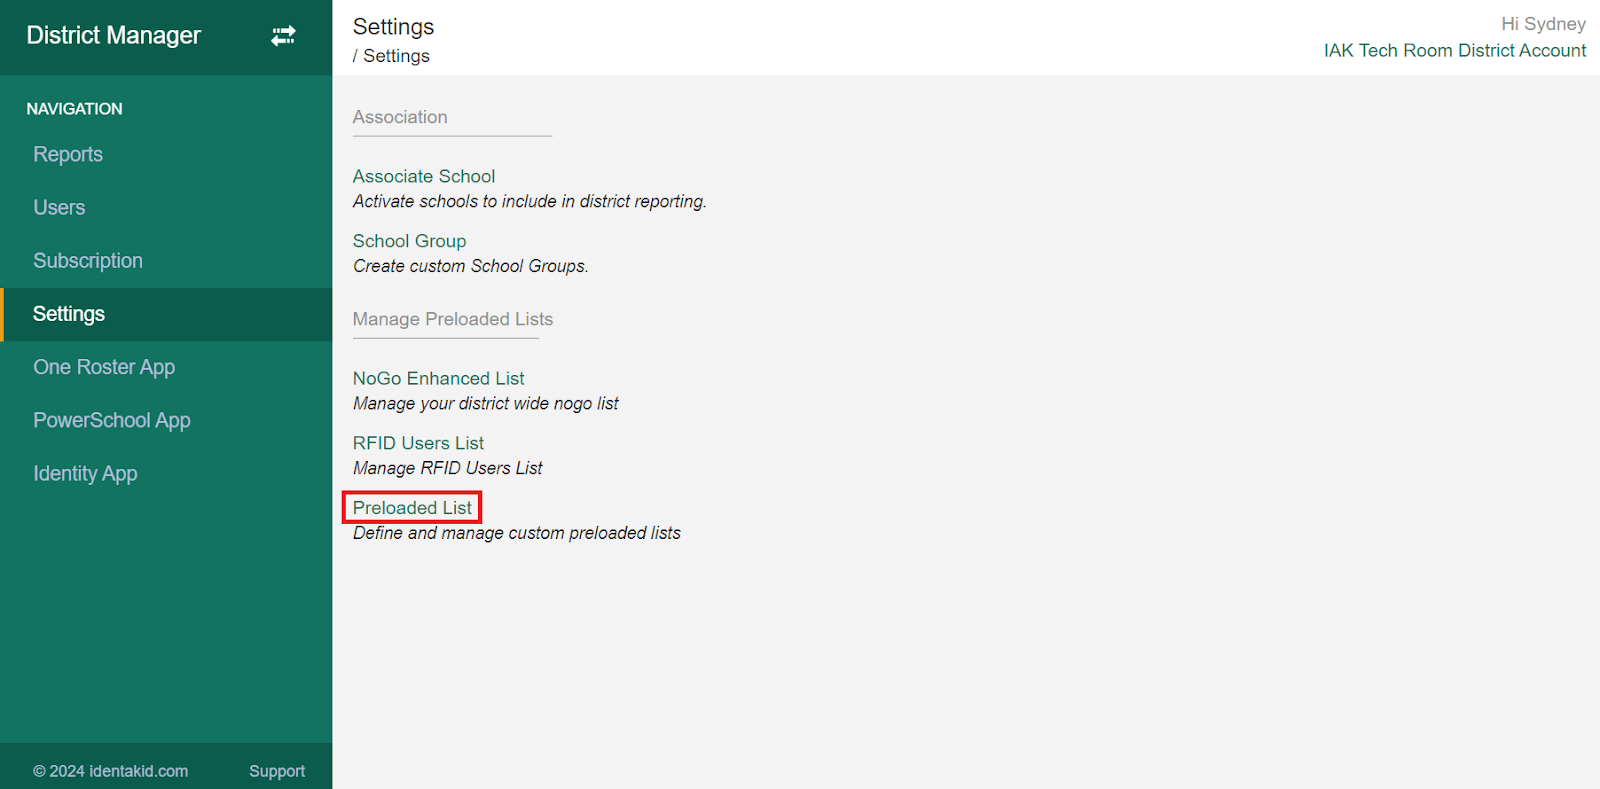
Next, click Preloaded List.
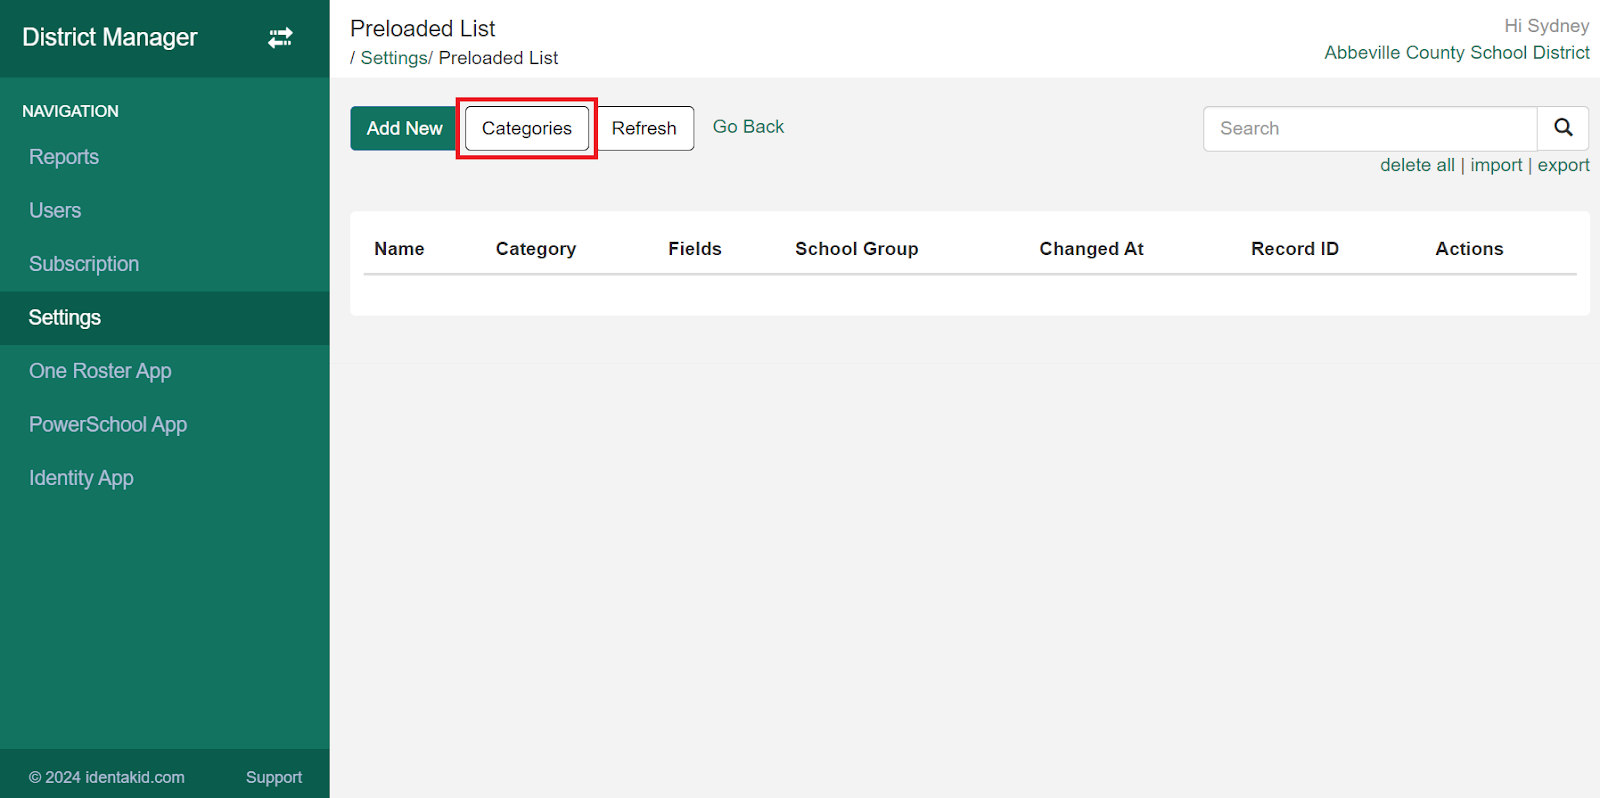
To create a custom preloaded list, first, click Categories to create a category for your list.
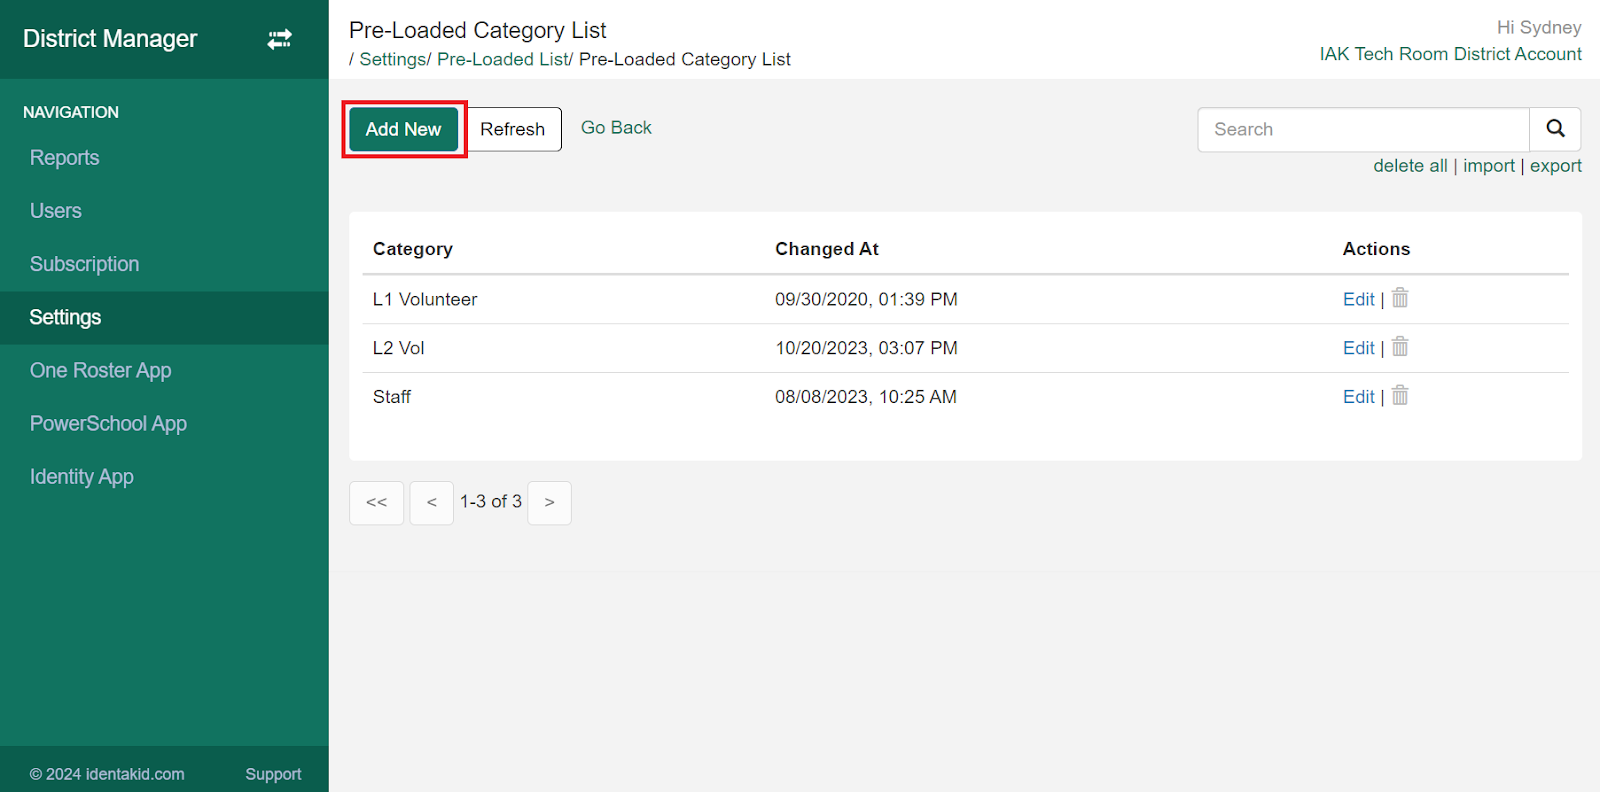
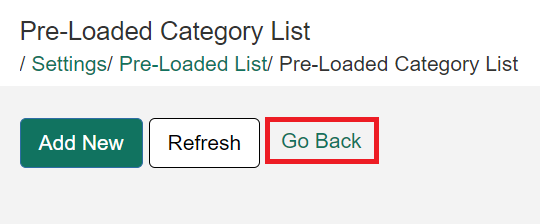
At the top of the page, click on Add New. After entering the category name, click Save, then Go Back.
After the category for your list is created, you will have to either import users via CSV or manually add your users to the list.
To import a list of users, it is best to manually add one user first and export the CSV file. You’ll then add your other users to the CSV file using Excel or a similar program before importing it back into the District Manager.
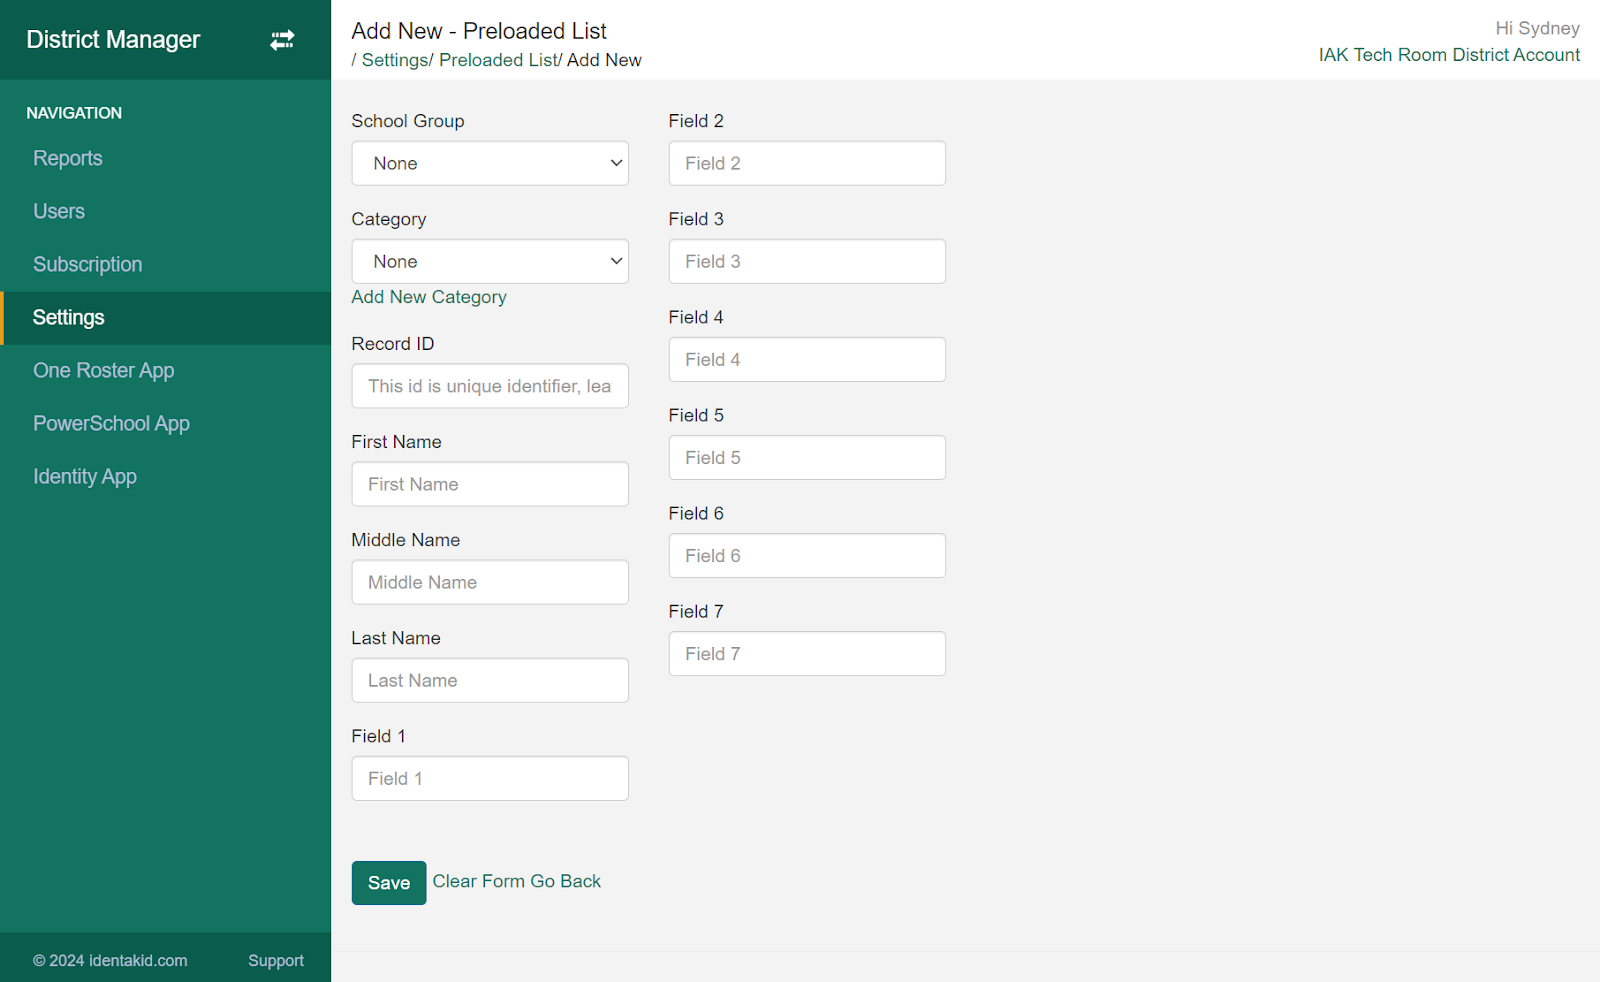
To manually add a user, click Add New, fill out the information for the user, and Save. Click Go Back once you have saved the information.
To export the Preloaded List as a CSV, click on export in the upper right-hand corner.

Please make sure that the file version is set to Web District Manager before clicking Export File.
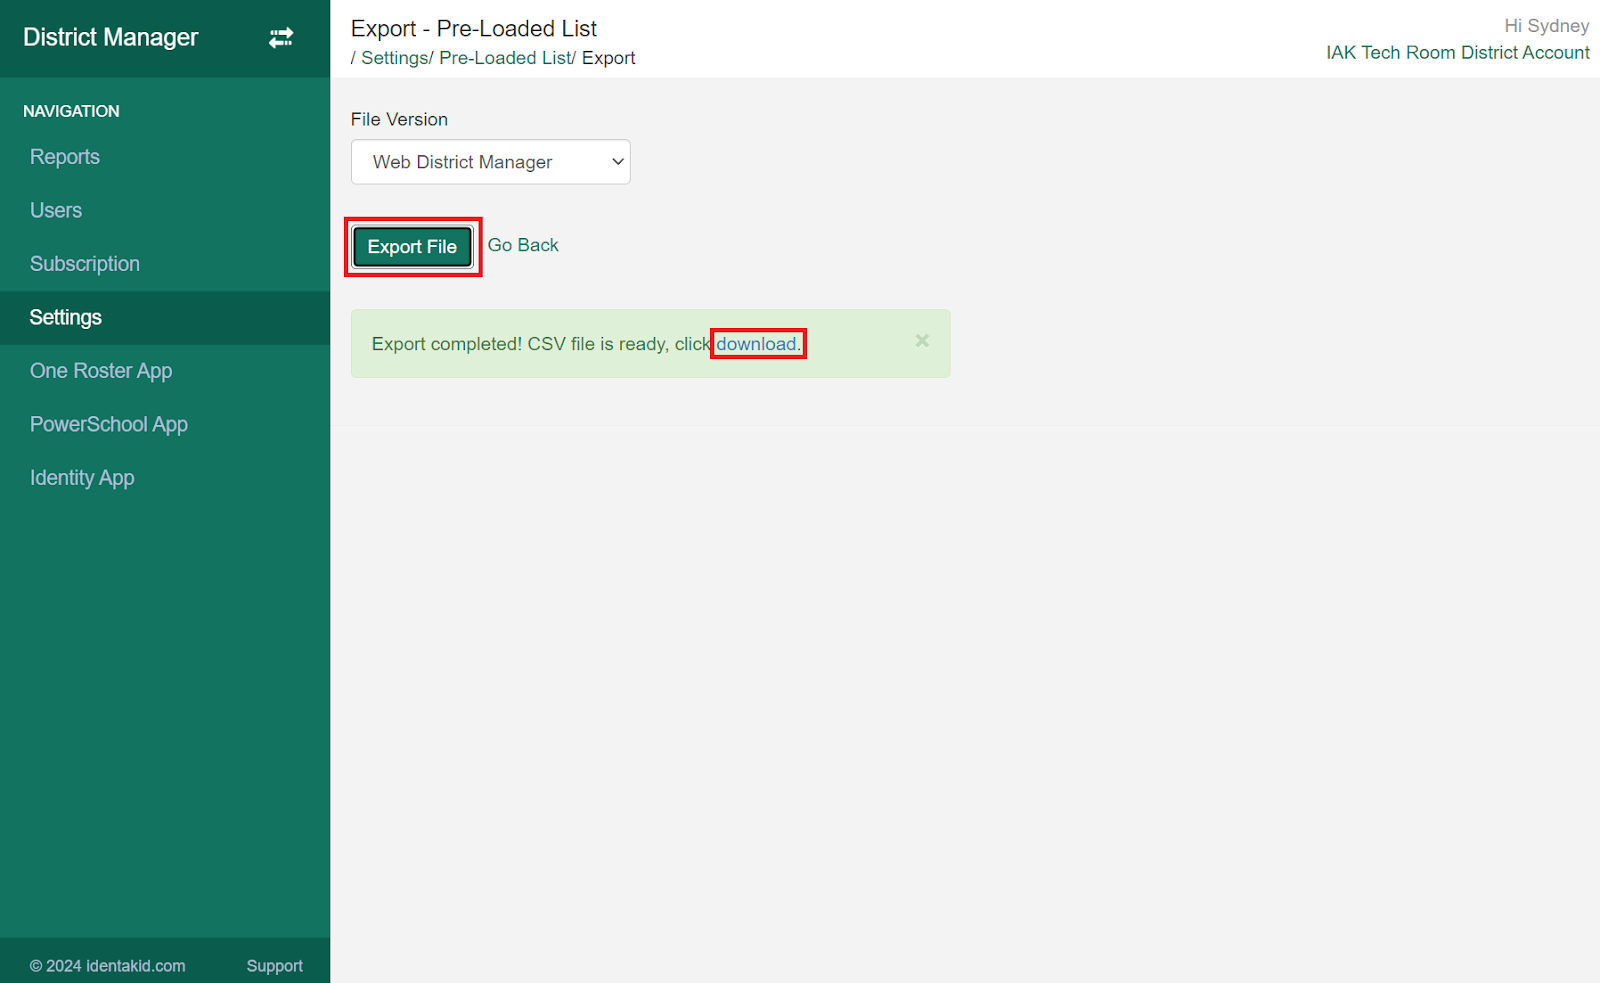
Once the export is complete, click on download to obtain the CSV file. You can then open the file in Excel or a similar program to add multiple users.
It is important to avoid making changes to the spreadsheet headers (CATEGORY, LAST NAME, etc.). Additionally, make sure that you have entered a Category name and School Group as previously added in the District Manager. When you have finished adding users, save the file.

Back on the Preloaded List page in the District Manager, click on import in the upper right-hand corner.

Make sure that the file version is set to Web District Manager before clicking Browse.
Select the previously updated CSV file and click Upload.
