Step 1 – Review Your School Manager Settings (PowerSchool)
Consult your district contact before making any changes.
Let’s go over the settings that you should have in place for your tardy, early release, and returning students' badges to correctly post to PowerSchool. This should be your first step when integrating with PowerSchool. (You can have other badges that will also post to PowerSchool. These badges do not have to have the words “Tardy” or “Early” in the badge title but are still required to be configured as outlined below.)
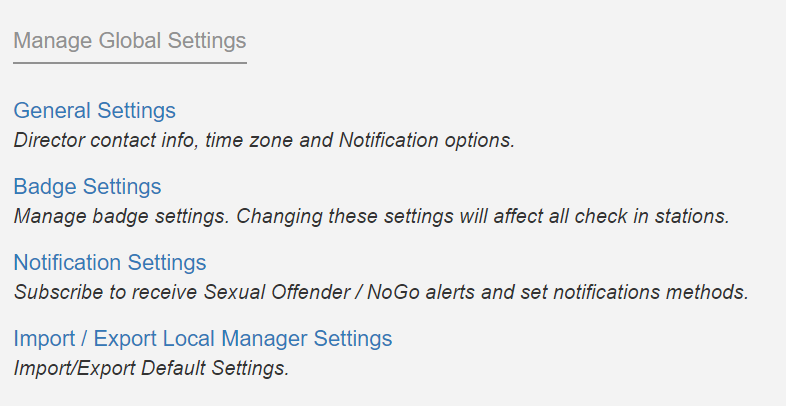
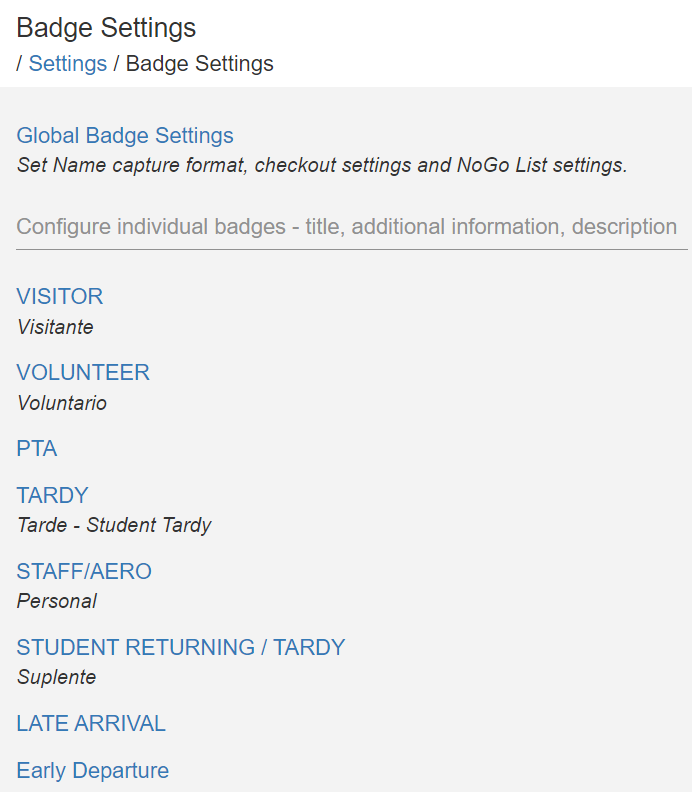
First, access your School Manager and navigate to Settings>Badge Settings.
Badge Title
Your badge title can be whatever you desire as long as Additional Info and attendance codes are entered for the badges you wish to use for PowerSchool and the preloaded category is set to Students. If you give the badge a name that includes the word early or tardy, attendance codes will automatically sync to those badges. If your badge name does not include these keywords then attendance codes will have to be entered into each badge's Additional Information area manually.
How to Change Your Badge Title
- Click on the badge name within your badge list.
- Click Display to change the title.
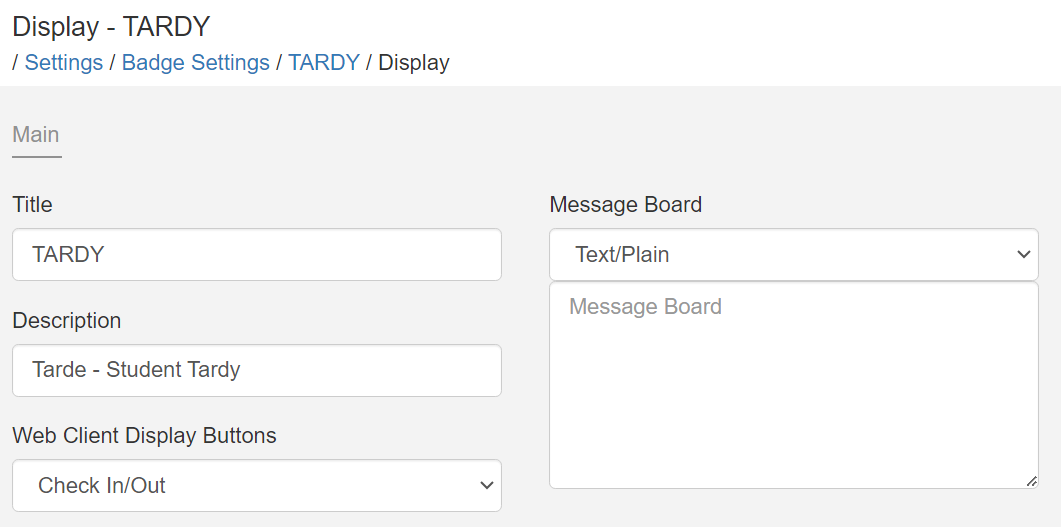
- Be sure to click Save at the bottom.
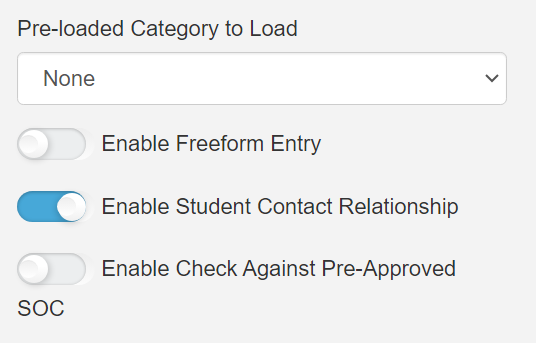
Preloaded List Category
For each Powerschool-related badge, you will want to enable the Student’s preloaded list. To do this, in the Display settings area from above scroll to the bottom and choose Students from the drop-down.

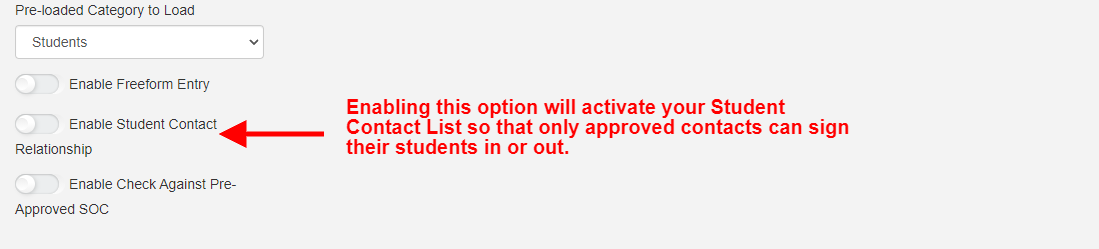
If you are using the Student Contact Relationship option then you do not need to set the preloaded category to Student. Leave that field blank. More information on the Student Contact Relationship option is below.
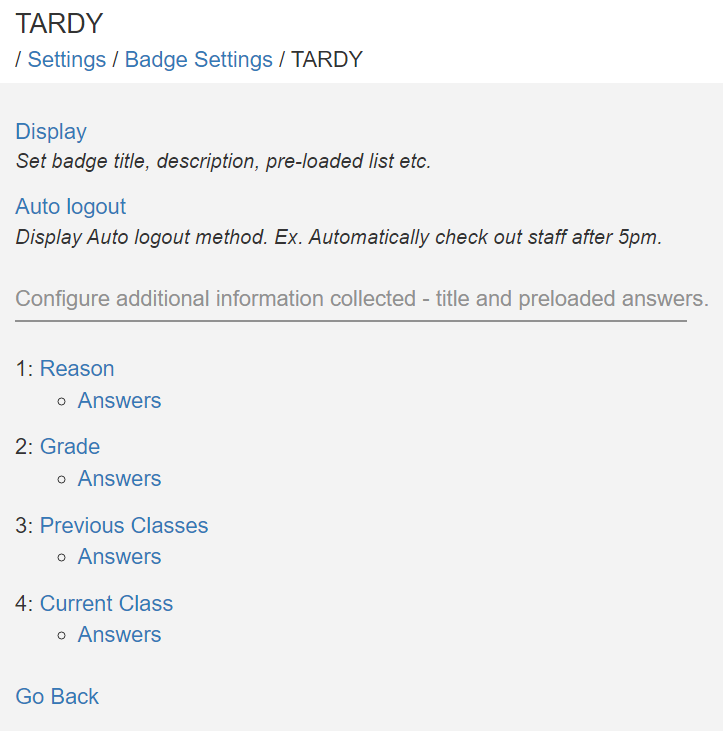
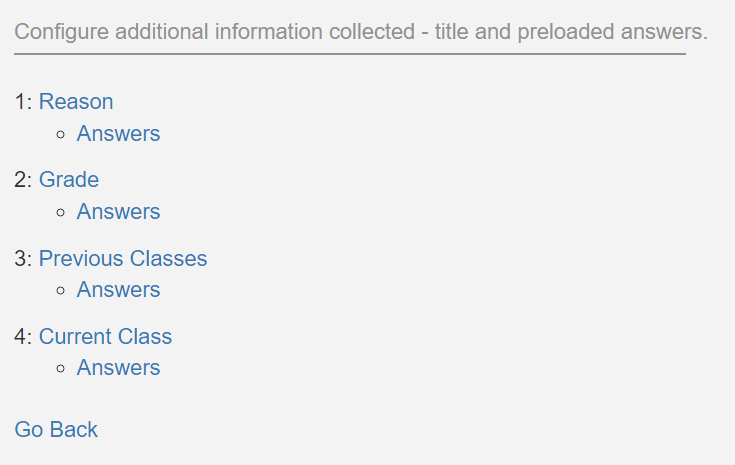
Additional Information
We use Additional Info 3 (Previous Classes) and 4 (Current Class) for your attendance codes, depending on the attendance mode being used.
Daily Attendance Mode - Uses only Additional Info 4
Period (Meeting) Attendance Mode - Uses Additional Info 3 and 4
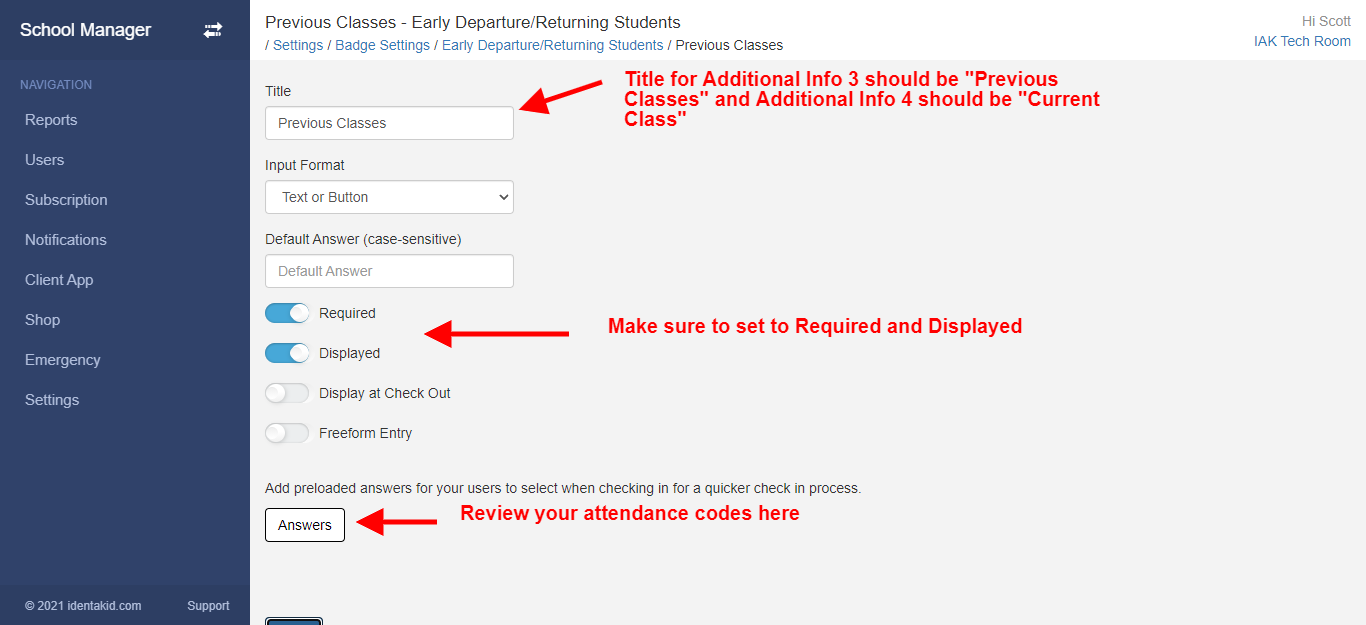
When the initial sync from PowerSchool is done, Additional Info 3 and 4 will update with the appropriate title and attendance codes for any badge with the word early or tardy in the badge name. If you have a badge you want to use for PowerSchool that does not contain these keywords, just make sure to label Additional Info 3 as Previous Classes and Additional Info 4 as Current Class. Click on the Additional Info Title to change the label.
You will also have to type in the attendance codes into the Answers area manually.
Below are the required settings based on the attendance mode being used.
Daily Attendance Mode
Tardy Students
Additional Info 4 set to required and displayed
Preloaded category – Students
Early Release Students
Additional Info 4 displayed and required.
Preloaded Category – Students
Returning Students
Additional Info 3 (optional, set to displayed but not required if Previous Classes attendance code needs to be updated)
Additional Info 4 displayed and required
Preloaded Category – Students
Meeting/Period Attendance Mode
Tardy Students
Additional Info 3 and 4 set to required and displayed
Preloaded category – Students
Early Release Students
Additional Info 3 (optional) set to displayed but not required
Additional Info 4 displayed and required.
Preloaded Category – Students
Returning Students
Additional Info 3 (optional, set to displayed but not required)
Additional Info 4 displayed and required
Preloaded Category – Students
Once you have set your badge titles and additional information settings, you will want to check your student and student contact preloaded lists. If you currently use these lists and plan to use them for PowerSchool, it may be a good idea to delete the lists to start fresh with student and contact data synced directly from PowerSchool.
Click Delete All to clear the list.

Student Contacts
If you plan to sync over Student Contacts, you can turn that list on for your Powerschool-related badges to allow contacts to sign out their students. To activate the contacts list for this purpose, in Badge Settings, click the badge title, then click Display. Scroll down and look for the Enable Student Contact Relationship option and activate it.
For more information on configuring the Student Contact list, click here.
Be sure to click Save at the bottom.
IMPORTANT NOTE
It is important that you understand how your contacts are listed and associated with your students in your PowerSchool module. Pay close attention to the School Pickup column in your contacts’ PowerSchool profile. We will go over this setting in a future step.
The next step is to Choose your preferred integration.