Bixolon Printer (Web Client)
Please note that you can only have one of each printer model connected to a single PC—having two of the same printer model (e.g. XD3-40d, XD5-40d) connected will likely cause printer swapping issues.
Your Bixolon printer will need some setup steps completed before you can start using it with the CENTEGIX Visitor Management software.
- Unpackage and plug in the Bixolon printer to a wall outlet but do not plug the USB cable into your PC yet.
- Use the rocker switch on the back of the printer to power the device.
Insert your labels into the printer and make sure the feed latches on either side of your labels are snug against the label edges. The labels should be facing up.
Before you plug the USB cord into your PC you must install the drivers. You can obtain the drivers from here.
During the driver installation, it will ask you to plug in the USB cable.
Once the driver installation is completed and the printer is plugged into the PC you will need to change the offset value and label size.
To adjust the offset value and label size:
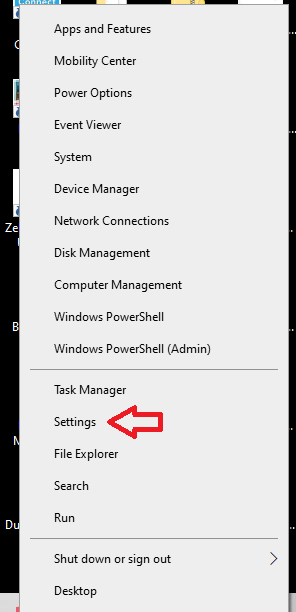
- Right-click the Start menu and select Settings.
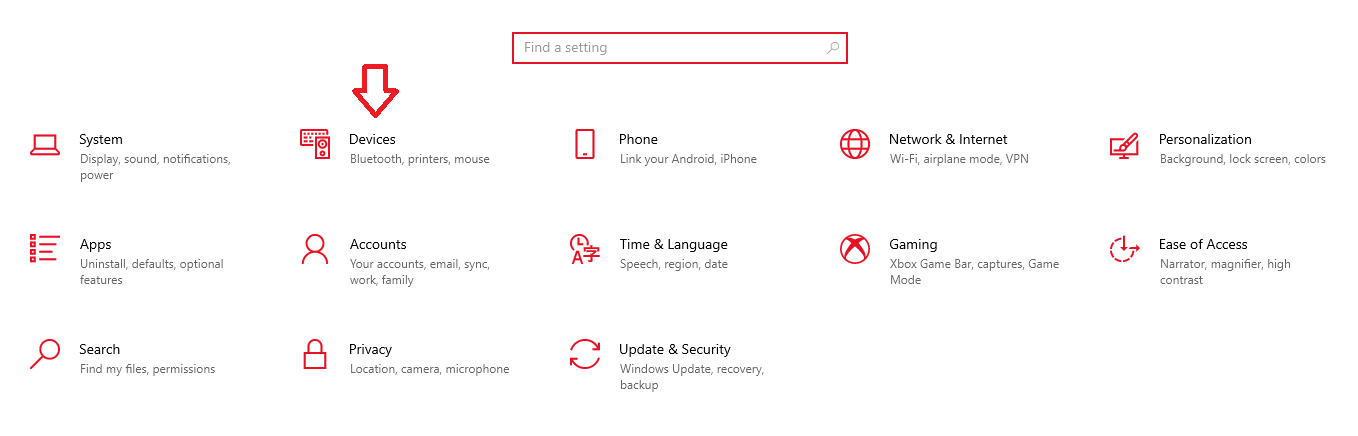
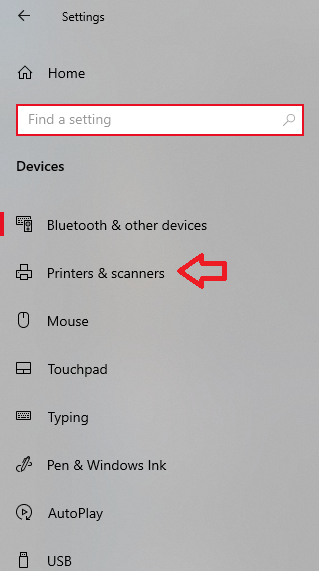
- In the Settings menu, click on Devices, then click Printers and Scanners on the left.
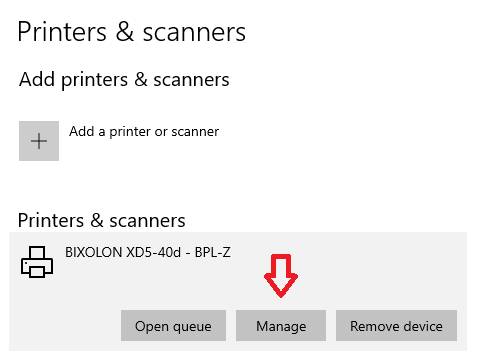
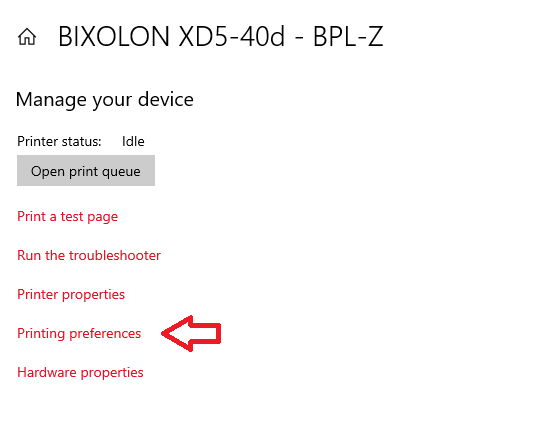
- You should see a printer labeled “Bixolon.” Click the printer and select Manage, then click Printing Preferences.
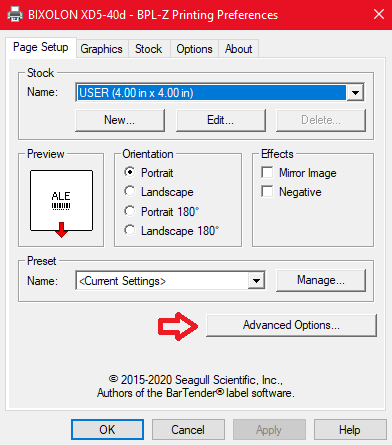
- Under the Page Setup tab, click on Advanced Options.
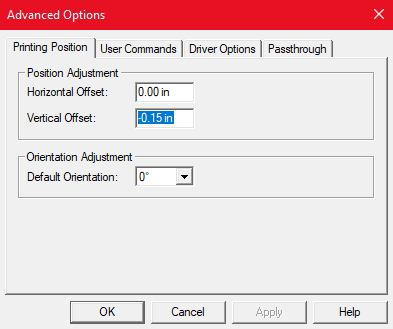
- Under the Printing Position tab are 2 fields: Horizontal Offset and Vertical Offset. Change the vertical offset value to -.15 in as shown in the image below. Don’t forget the minus sign. Click OK when you are done.
- Back in the Printing Preferences screen is an area at the top called Stock. Click Edit
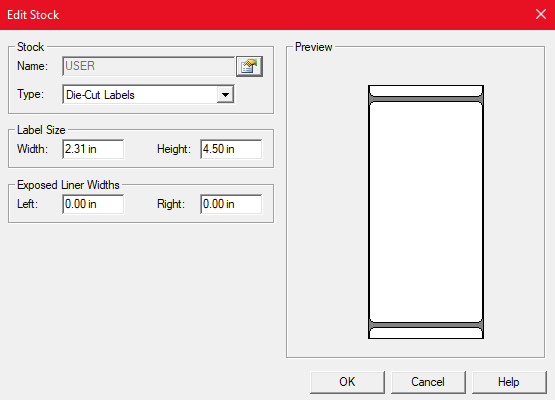
- Adjust the label height and width to match the image below. Width is 2.31 inches, and height is 4.5 inches.
Some printers will need to first be reset to factory defaults, and some tests run before they will work correctly if they have tardy passes loaded. If the above steps do not work, perform a reset and test using the following steps:
- Unplug the printer for 30 seconds, then plug it back in and power it on.
- In Windows, right-click the Start menu and click Settings.
- In the Settings menu, click on Devices, then click Printers and Scanners on the left.
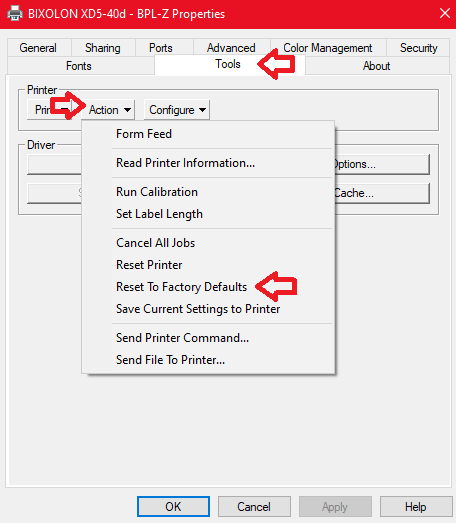
- Click the printer, select Manage, and then click Printer Properties.
- Click the Tools tab then click Action>Reset to Factory Defaults. This will cause the printer to feed out around a foot of labels and the lights on the printer will turn orange and then will turn green.
6. Use the steps above to adjust the offset and label size values.
7. Once the printer lights are green and the offset and label size values are set, you will need to change the paper type and perform a test print.
8. In the same menu where the label width and height are set, change the Label Type to Continuous (Fixed Length) and perform a test print through Windows. This should print around a foot of labels but should print a test label at the end.

9. Set the Label Size back to Die-Cut Labels and click OK on all open dialog boxes.
10. Perform one final test print through Windows, and one correctly sized label should be fed out.
The printer is now configured and can be set up in your IAK Web Client.
If you need assistance with this installation, please contact our support team at 1-800-950-9202 Option 2.